How to fail at quickly peeling an orange

What happens when I try the trick to peel an orange

Call it a DIY. Call it an easy craft. Call it Betty. I saw a video somewhere on the internet where it was supposed to be easy and quick to peel an orange if you cut the ends off. It’s supposed to roll out like the sleeping bag of fruits. I mean, that’s sort of what I got when I tried it… See the video for what happened. 🤦‍♀️🍊

Blueberry Cheddar Pizza with Yogurt Crust

blueberry cheddar pizza yogurt crust

I was at a friend’s house over the weekend and he taught me how to make pepperoni pizza at home, using yogurt and flour for the dough. I wanted to try and replicate his recipe, however, it was late in the day and my immediate goal was to eat, not to shop for groceries. The ingredients I had on-hand, however, substituted nicely to make a dessert.

His pizza used a cup of plain yogurt and 1 ½ cups of self-rising flour for the dough. I had yogurt with bits of strawberry in it – and it didn’t amount to a cup, but the fruit made it juicier, so I still needed 1 ½ cups of flour. He used tomato sauce, I used butter. He used mozzarella, I used cheddar. He used pepperonis, I used blueberries. Pictures of the process are below and here comes the recipe.

INGREDIENTS:

  • 1/3 cup yogurt with fruit
  • 1 ½ cups self-rising flour
  • handful o’ blueberries (fresh or frozen)
  • Pam or some kind of cookie sheet spray
  • 1 TBSP soft butter
  • handful o’ shredded cheddar

TOOLS:

  • measuring cup
  • fork
  • rubber stir thing (optional)
  • cutting board or clean counter top
  • rolling pin (optional)
  • cookie sheet
  • pizza cutter

VIVA LA INSTRUCTIONS:

First thing, turn the oven on to 400°F. It should be ready by the time you are. I started with this cute little cup of yogurt and fruit. You could change out the yogurt flavor, but I had strawberry, so that’s what happened. It was only 1/3 of a cup, but it was more liquid than plain yogurt, so I added 1 ½ cups of self-rising flour.

blueberry cheddar pizza yogurt crust2

Mixing the yogurt and flour: I tried stirring it in this measuring cup with the rubber stir thing, but the flour started to poof out of the cup, so I went with a fork instead and that did the job nicely. Note the red plastic on the counter. This is what I use for a cutting board and for when I need to knead dough. Do you feel the need for knead?

blueberry cheddar pizza yogurt crust3

I don’t have an in between picture, but I sprinkled extra flour onto the red plastic sheet and then used the rubber stir thing to rake all that bidness out of the cup and onto the flour. It doesn’t matter how much of this you do with utensils, you will end up get big blobs of dough on your fingers, so go ahead and fall in love with it.

Take a handful of blueberries and lob them on top. Fold the dough over itself two or three times, adding flour to it to make sure you don’t have wet parts. It should be similar to Play-doh, but it should definitely smell better.

Use the rolling pin to feel like a big fancy chef while you’re spreading out the dough. Be careful because you can pop a berry with that thing. If you don’t want berries to die, you can always spread the dough just using your hands. Don’t spread from edge to edge – just spread from the middle out. If you feel like you are going to have a psychedelic freakout because the edges are uneven, you can cup one hand on the outer edge while you spread the dough into it with the other hand.

Spray your cookie sheet with Pam or something like it (vegetable oil spray). To get the dough from the red plastic to the cookie sheet, I put the cookie sheet on top of the dough/plastic and then flipped the plastic over, so the pizza is now upside-down from what I had been looking at.

blueberry cheddar pizza yogurt crust4
This butter and cheese part came as an afterthought, because the above effort was too naked to be pizza, not sweet enough to be cake and too flat to be a muffin. Slather on some soft butter with your fingers, then add a handful of shredded cheddar. Maybe you don’t normally think of cheese and fruit together, but imagine it as some guys that were on a party platter together one time and they decided to get together to make a jazz band.

blueberry cheddar pizza yogurt crust5

Now that you have the raw pizza made up, your oven is probably up to 400 degrees, so put that feller in the box. Set the timer for 10 minutes. Note that I used a convection oven, so your time may be a little longer – like 12 minutes. Just be sure to check that the middle is done. You’re going to end up with this bad boy here. Plate it and survey its majesty. It’s still too hot for your human mouth.

blueberry cheddar pizza yogurt crust

After shaking off the magnetism of its beauty, grab the pizza cutter and slice it into sub-shapes that are acceptable to your brain’s organizational makeup.

blueberry cheddar pizza yogurt crust6

Put a piece on a place with those taquitos you were making in the toaster oven this whole time. Eat one taquito and one piece of blueberry pizza before you take any pictures, to make it look like you eat less food than you really do.

blueberry cheddar pizza yogurt crust7

Mmmmm…

This recipe was originally posted on MySaline.com on July 21, 2015.

How to Make Fried Pickles – a.k.a. Emerald-bellied Cronchers

I fried some pickles today and it’s a basic and yummy snack or side item. You don’t have to sit in a Choli’s or Appleboy’s restaurant to get these emerald-bellied cronchers.

Start with your favorite brands of corn meal, self-rising flour and sliced pickles. My favorite brand is el cheapo.

Before you start mixing stuff, turn on the deep fry thing. If you don’t have a deep fry thing, use a small pot and put an inch of oil in the bottom. Some folks use vegetable oil – I use olive oil. Anyway, get that stuff hot while you do these other things below.

Grab a small container – plastic ware with a lid or even a zippy sandwich baggy. Chuck in some each of cornmeal and flour. I don’t measure. Just consider how many pickles slices need to be covered. This is maybe a half cup each pictured.

Fork up some pickle slices and chuck them in there too. Mmmm pickles. It’s okay to eat a couple raw. I won’t tell.

Pop the lid on and shake those babies up. Shooka shooka shooka

Now you have what kinda looks like ugly Muppets. Like Oscar the Grouch, they are not tasty – yet.

Use the fork, padawan, to put the pickles in the fryer thing. It’s probably way hot by now, but you can test it by flicking a little water in there. Did it go TSSS? It’s hot. Dunk ’em.

Wait about 4-5 minutes and your pickles will be floating and golden. Some folks like them darker than gold. You do you.

Drain your crispy critters for uno momento whilst appreciating that the fry bucket now looks like a smiling snake with crooked, brown, pickly teeth.

Cascade the pickles on a fresh, bright paper towel (that means dump them out, y’all) and shake a little salt over the top. Add some ranch dressing if you desire. Charge your family $5.95 + tax and tip. Yummers. Here’s that money shot again:

First time using Air Fryer – slow potatoes, but yummers

Air fryer french fries from raw potato

My face when I’m starving but I’m only 12 pages into the 32-page air fryer operation manual. But then I find out the second half is just repeating it in Spanish:

source (1)

One. Hour. Later.

My initial Air Fryer test is complete. Wildly entertaining video below.

Preheated fryer to 360°. Cut potato & soaked in cold water 30 min. (Soaked the potato, not me. That’s a summertime recipe you’re thinking of.) Covered in tiny amount of oil (about 1/2 a teaspoon) and salted them. Then I put them in the fryer for 25 minutes.

If raw potatoes and an air fryer are the only things you have around to cook with, then one hour may seem a little more acceptable to end up with this small amount of french fries. However, they were very tasty and now they are very gone.

Wasabi Eggs Backfired, But I’m OK With That

FB_IMG_1574998590948

I was in charge of deviled eggs for Thanksgiving at my parents’ house. I thought I’d prank my oldest son so I put wasabi in some of the deviled eggs. Well they turned out darn tasty and now I’m sad that I didn’t make more. 🥚🤷

Someone asked me how to make it. Well… you boil some eggs and peel them. Cut ’em in half, pick their li’l yellow tummies out and chuck that yellow in a mixing bowl. Line up the white parts real pretty on a plate or egg dish or whatever is necessary for the journey the eggs will eventually make. You don’t want any egg rollover. It’s just not pretty.

So next you use this row of stuff. Pickle relish, mayonnaise, mustard, and wasabi.

PSX_20191128_215253-800x407

Here’s where it gets hazy. Or squirty I guess. I mean I just squirted some of each into the bowl of yellow tummies. It could be a delicate balance, but the bottom line is you need enough moisture in the mixture for the yellow stuff to stick when it gets spooned into the white stuff.  But not so much that it can run off the spoon. And not so dry that a dear relative could get choked up and cough their dentures out. Just go slow with the squirts, mix it some and put in more if you need it.

Now that you have your innards, spoon it into the egg halves. You can put pepper on the tops or paprika or both. Yesssss delightful.

Wait. What do you mean you don’t know how to boil eggs? Ok I’ll tell you. But for this, I cook it longer than just regular boiled eggs. Because I like ’em soft like my own middle.

Okay, get a pot and bring it to the sink. Gently put your eggs in it. Put in enough water to cover your eggs. Next put in about 2 teaspoons of cooking oil. Put the pot on the stove on high. When the water boils, out a lid on the pot and leave it 5 minutes.

Take the pot to the sink and tip it to the side to drain out as much water as you can. That hot water is good to wash away all the junk in the sink that your weak little hands tried to scrub earlier. Now get some cold water in there from the sink. This and the cooking oil are so it’s easier to get that shell off.

When the cold water is drowning all your eggies, take them out one at a time and crack the shell on the side of the sink or on the pot. Crack it all the way around the egg. Next start peeling from the end of the egg and chuck the peel in the trash. When your eggs is naked, give him a shower in the faucet water to take away any leftover shell.

There ya go. Boiled eggies.

It was supposed to be chili, but Sloppy José I guess

Sloppy Jose 20191111_210243

Step 1. Brown some ground beef and put in all your secret spices that everyone else also uses to make chili, then remember you don’t have tomatoes and it’s too cold to go to the store.

Step 2. Sit down and pout even though you know it’s your fault for not finding all the ingredients before starting.

3. Put the beef in a plastic container and swear you’re going to add tomatoes and beans tomorrow.

4. Continue to be hungry for chili, because of course you took a taste and now it’s got you in its grip.

5. Decide you’re smarter than people who can’t have fun without tomatoes.

6. Put the greasy pan back on the fire.

7. Throw in some shredded mozzarella because the cheddar is in the freezer. Jesus now has the wheel.

8. Search the fridge for divine inspiration. Wasabi? No. Pickles? No. Leftover Tacos 4 Life sauce from a faded rice bowl in the rearview mirror of your heart? YES!

9. The mozz is changing shape so scoop a sloppy joe’s worth of beef over it and use a spatula to push out rows in the beef like you’re about to plant seeds for next year’s soybean harvest.

10. Shake that tiny T4L sauce cup like the spray paint can dedicated to your next misdemeanor then only splash a little on the beef because that stuff is gold and you’re lonely but not desperate.

11. Pinky-groom your eyebrows and think about the time you and your friends made up that dance to Leif Garrett’s “I Was Made for Dancin” and blame your lack of fame and fortune on the one kid who wanted to be a team player but only liked country music.

12. Barrel a rolling pin across two slices of wheat bread that came from a bag with a Disney character on it because you also don’t have tortillas in the house, you absolute Yugo of a human.

13. That mozz is brown and cronchy by now but the spatula isn’t your friend for a cheese flip. Unless you like so many folds in your sammich it books an Oktoberfest gig and starts stretching out to play The Chicken Dance. Just pick up the pan and pour everything on your now-flat bread. Smash the lid on top (for y’all playing at home, that’s the other piece of bread).

14. Get out the pizza cutter so you will have dirtied at least 10 dishes at this point. That’s how you know you’re a genius chef.

15. Eat the first triangle and bend your knees while yelling “GOOOOOAAAAAAALLLLL!” You know why.

16. Stack the other 3 triangles and charge them $50 for a photographic sitting fee.

17. Eat the 2nd triangle while you edit the photo.

18. Eat the last 2 while you post nonsense to Facebook.

19. Wonder how it’s possible you’re single.

20. Nap in the recliner.

The pig on the 5-day cruise

Carnitas cinco de Mayo Mexican pork FB_IMG_1573539862308

Happy Cinco de Mayo! Carnitas with black beans, pineapple, avocado, salsa, cilantro and cheddar. I named it The 5-day Cruise. And then I ate it.

The Perfect Boiled Egg Needs More Science

boiled egg

Scientists, I need you to stop what you’re doing and figure out a thing to alert average folks that it’s the perfect time to take the eggs out of the boiling water. I did really well this time. I managed to get a pure yellow yolk – no green and not runny – and in the texture range smack between fudge and brownies. Oh man, to eat these things warm was a beautiful experience. You completely forget they came out of a chicken butt. Continue reading “The Perfect Boiled Egg Needs More Science”

Video: Shelli tries new food – Almond Butter!

newfood frame

I was at the grocery store and looking for healthy things to eat. I had a basket full of veg and then I was looking for some sunflower seed or something similar. Strolling down the nut aisle, I spied this lady working at a machine that I had previously mistaken for a nut dispenser (the machine, not the lady). Continue reading “Video: Shelli tries new food – Almond Butter!”

Fresh Homemade Avocado Pico de Gallo

The healthiest snack that I’ll actually eat.

20160627_205422

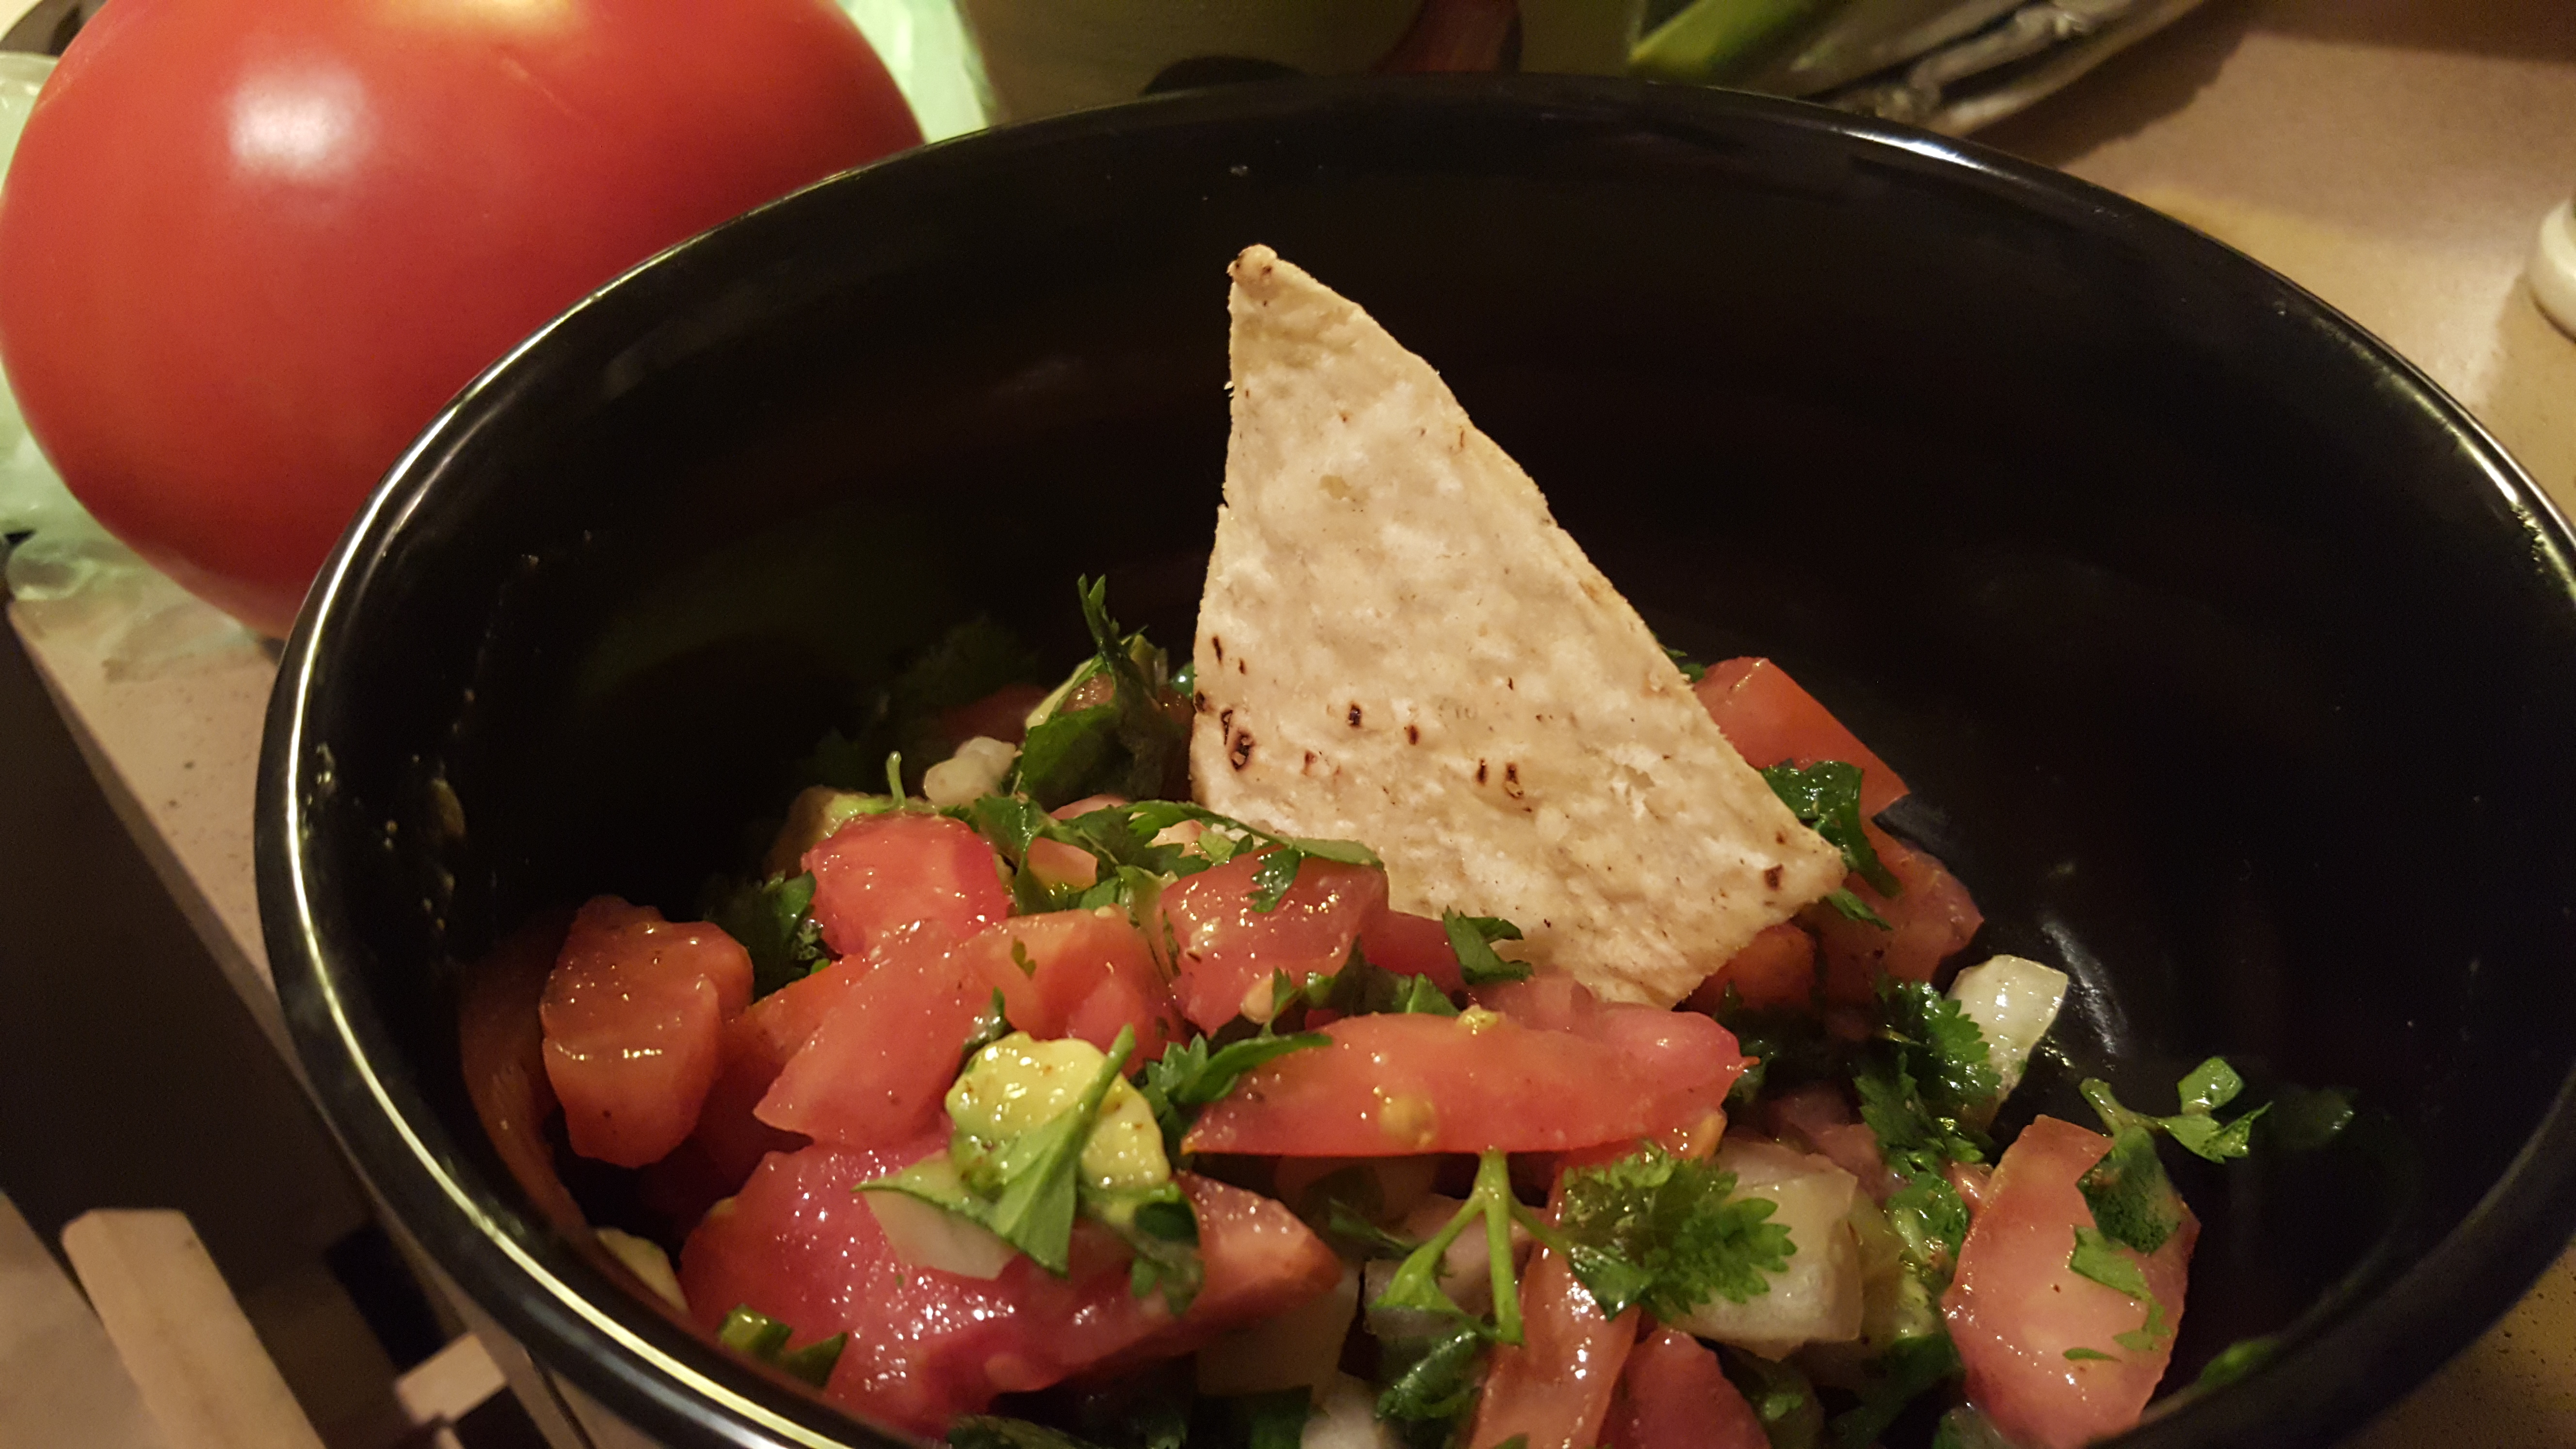
I love this dip and it’s probably the healthiest snack I’ll ever make (that I will actually eat). But as a single person, I have to be careful to either make just the amount I’m going to eat for a meal…  or else plan on eating it for the next four to twelve meals.

I really think there should be something like a dating app, but it matches you to nearby people who want to eat the same thing as you, just not necessarily someone you want to look at while you’re eating it. I mean it’s  not going to be a dating app. It’s going to be an app for sharing food with a synthetic family.

Right, so anyway… Pretty easy to make… You are going to have ingredients lined up according to how much you like each one. I go light on the onion but there’s a Chia T-Rex worth of cilantro in my mix.

INGREDIENTS:

Tomatoes – 3 to 4 small ones or 1 fat country tomato like the Arkansas produce I used today. It was the size of a softball.

Onion (white or yellow) – I used about 1/3 of it.

Avocado – I used just 1 this time but you can use 2 and cross over into guacamole territory if you are feeling it.

Cilantro – At my Kroger, they come in cute little dew-covered bundles that are convenient and I say why in #7 below.

Garlic Salt – I thought about using the minced garlic out of the jar in the fridge but it’s not minced enough. You don’t want to bite into a raw garlic chunk. Whooo!

Ok, super easy, just chop all that bidness into chunks a size that makes Chiclets feel like they could beat them up. Then shake garlic salt on it and stir it up.

WHOA, HO,  wait a minute, new chefs… I’m giving some extra help here because I don’t trust you as far as I can throw 12-year-old me’s cooking skills. And also some of you are good at cooking things but might learn something here OR you might have a tip for me. I’m obviously not done learning.

Here is the low-down basic what-to-do for the kitchen clueless:

1. Wash your dang hands. With soap! Gross.

2. Wash the ingredients. NOT with soap! Just warm water, then cold water. Except the onion – see #6.

3. Get a clean cutting surface (plate / thick plastic sheet / cutting board) so you don’t lose your apartment deposit over this one meal.

4. Get a sharp knife. It’s the dull ones that slip and hurt you the most because they don’t make it through the food.

5. Cut the stem and stump out of the tomato and dice that sucka up. (Dice means to cut in squares, which is kinda weird because when you cube stuff, it’s in the shape of dice. Let’s move on.) watch your dang fingers!  I do not have time today to take you to the emergency room. Throw the chunks in a big bowl. No, bigger.

6. Peel your onion and get past that dry, flaky part. Rinse it some if  that helps. Chop both ends off (the hair and the butt). Now wash it in warm water then cold and cut off and dice up your desired amount. Throw it in the bowl.

7. The cilantro coming in that beat little bundle comes in handy because you’re going be able to chop all the stem off at once. What a time to be alive! Now that it has no legs, chop up its face. I like to hold down the cilantro leaves by making an arch with my left hand (I’m righty). Then I insert the knife under the arch with my right hand and pull to the right over and over while holding the afro of greenery under that arch. “Arch arch arch!” That’s how Popeye the Sailor laughs. Throw your green stuff in the bowl.

8. The avocado is a diva that lets you get by with so much until you come to her hard heart and you have to stab it to kill her. Yes, really. Your avocado can’t be mushy. When you press your fingers on the outside of it, it should be firm but not hard. Ok let’s get in there. Don’t waste your time trying to peel an avocado. Word will get around the neighborhood and you will feel like a big dork. You just cut it in half (almost), lengthwise. Sit it on its butt and start slicing it in half like you’re going to cut it from top to bottom. But you won’t be able to get through the big ol’ pit in the middle of it, so cut a line all the way down one side and up the other. Then twist her open. There’s that hard heart. Now for real,  stab it with your knife and twist to pop it out. Ok? Now you can scoop out the avocado meat (fruit, veg, whatever it is) and slice it up into chunks. Throw your chunks in the bowl.

9. Put some garlic salt on it and mix it up. You might be surprised by how much salt you’ll put on it without it tasting salty, but take it easy and put a teaspoon at first, adding more until you either love it or throw up. Sometimes I also add pepper, chili powder and even a little cumin. If you want to try this, separate out a small amount to test how you like it. You don’t want to feel like punching yourself later because you messed up a whole batch.

If, like me, you can’t eat it all, try squeezing/splashing lemon or lime juice on the surface of it so the avocado won’t turn a funky color in the fridge.

If you made it this far, grab some tortilla chips and engulf your reward. Mmmm… I ate mine while writing this.